
How to make a vest pattern?
A vest is an extremely useful thing! In a women's wardrobe, he is simply irreplaceable. Several different vests, and you will look elegant in the office, and on the summer holiday, and on the sports ground. As for the representatives of the stronger sex, it is this item that gives the strict suit a particularly elegant look, and turns its owner into a true dandy. How to make a vest pattern? This you will learn from the article.
to contents ↑Do I need a pattern?
Before you make a pattern of a vest for women, decide which model you are going to sew:
- sports;
- denim;
- fur;
- in ethno style;
- to a business suit.
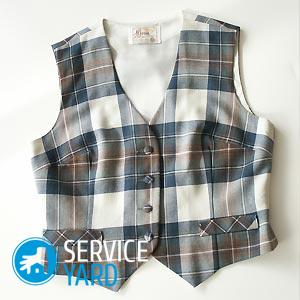
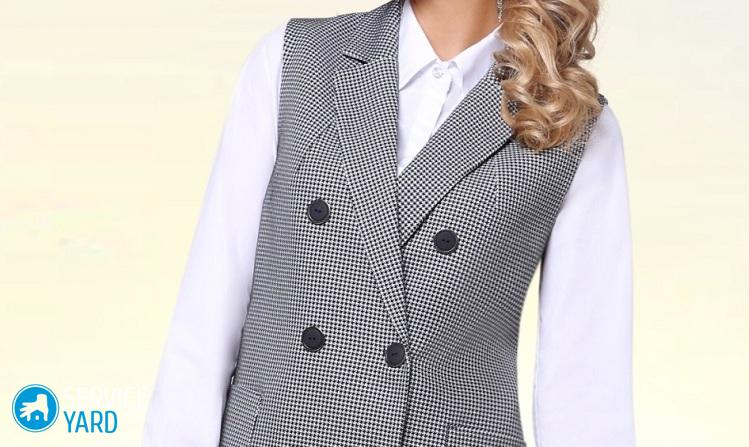
Each model has its own distinctive features. For example, an office vest:
- fitted silhouette;
- V-neck
- strap, like a men's vest.
Important! This item ended up in a women's wardrobe from a man’s, therefore it is sewn almost the same as a man’s. It can be with breast tucks or without them. Sometimes pockets are made on such vests - both patch and welt pockets.
Vest for folk costume
Remember the illustrations for the fairy tale about Little Red Riding Hood? The main character, like her mother and grandmother, also wore vests - black and short, which looked great with a white shirt and a bright skirt. Even peasant girls tried to sew such a vest from expensive material, such as velvet. The cut was made deep, and lacing was used instead of the fastener.
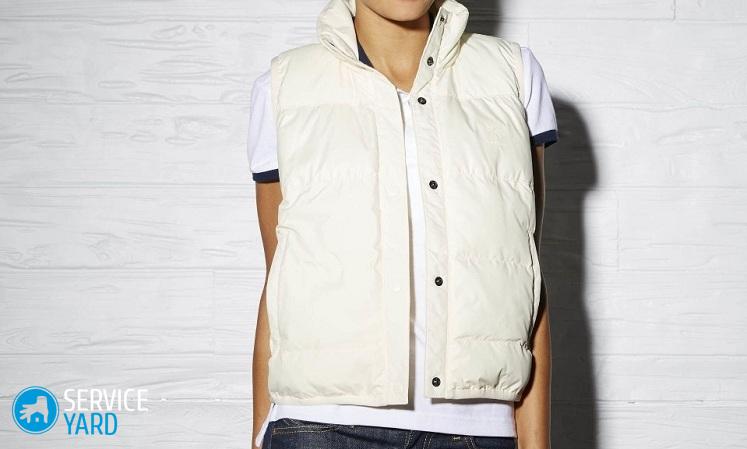
Sports vest
On a cool night in the forest or in the mountains, a sports vest on a synthetic winterizer is very useful. It is very different from business:
- as a rule, it is long - below the line of the hips, and even to the knee;
- the neckline is shallow, most often under the neck, sometimes with a stand-up collar:
- the fastener is a long zipper, and it is best if it is closed by a bar;
- side pockets are almost always made, and they also fasten tightly.
Fur and denim vests
For sports, business and folk vests, a pattern will certainly be needed. But there are some models that can be sewn without patterns - simply because you will use ready-made parts, and you can fit them according to the shape directly on the model.
For such vests you will need:
- old fur coat;
- Jean jacket.
If there is a natural or artificial fur coat that has gone out of fashion, is badly frayed on the sleeves or just tired - why not make some more modern garments out of it? As for jeans jackets, various troubles constantly happen to them, and it is usually the sleeves that suffer from scuffs and stains of paint. Tearing it apart completely - not to love yourself, it is quite difficult to make branded seams on such thick material. But you can use the details of the shelf and back with everything that is on them.
to contents ↑We make a pattern of a classic vest
How to make a vest pattern? The easiest way to do this is the basic pattern of a dress or blouse. The question immediately arises: where to get the basis?
There are several options:
- build on your own;
- order at the studio;
- transfer from a magazine;
- rip and circle some unnecessary, but suitable for this purpose thing.
Self-construction of the pattern is a long and laborious process, in addition, you need good leadership. Of course, on the Internet now you can find anything, including sites where all this is described in detail, or old books on sewing.
Not everybody has the opportunity to order patterns from a good cutter, so the vast majority of needlewomen either translate patterns from magazines or cut new clothes in the old. As for the magazine, you need to choose:
- the simplest model of a dress or blouse;
- the style should be with tucks, and not with reliefs;
- for a vest, sleeves, of course, are not needed, but if you intend to continue sewing, translate the product pattern with a straight sleeve, long or short.
to contents ↑Important! The base pattern is best glued to cardboard, then it will be possible to work with it for many years.
Based on
So, you have a base, but it is not particularly suitable for a vest - a neckline, and armholes have a width suitable for attaching a sleeve.
Important! Consider one more circumstance. The dress is worn only on linen, and the vest on a sweater or blouse. Therefore, you need to make an increase in freedom of fitting.
To improve the pattern, you need to know:
- product length (measured from the cervical vertebra to the bottom of the vest;
- distance from waist to bottom of vest;
- chest girth;
- waist circumference
- hip girth;
- cutout depth;
- the distance from the armpit to the bottom of the armhole of the vest.
In addition to measurements, you will need some tools and supporting materials:
- a large sheet of paper (a sheet of whatman is enough for the eyes, but it's better to take graph paper)
- a simple pencil;
- color pencil;
- long ruler;
- gon.
Important! A very convenient thing is a protractor, with which you can well adjust the angles at the bottom of the vest.
Mark the length
Before you build a vest pattern, you need to transfer to a large sheet of paper the main patterns - a shelf and a back. Do not forget that the vest cannot be sewn strictly according to the patterns of the dress - make allowances for a loose fit of 1 cm on each side, and then even allowances for the seams. Continue tuck lines. In addition, in the middle of the front is a strap for fasteners.
Important! It is convenient to arrange the patterns that you will circle so that one of the long lines (for example, the line of the middle of the back) coincides with the long side of the sheet.
Then the process goes like this:
- Outline the details with a simple pencil.
- Mark the waist line in the same color.
- Set the line between the waist and the bottom down from the marked line.
- Draw a line parallel to the waistline through this mark.
- In the middle of the back, measure the distance from the bottom line to the neck - it should be the same as the length of the product that you measured on the spine.
Important! Do not forget to leave an allowance for bottom processing - 3-5 cm.
Adjust the angles
What will be the angles on the front of your vest? They may be:
- straight;
- rounded
- beveled.
If the angles are right, you don’t need to do anything else in this part of the pattern. For many office vests, the bottom is designed that way. If the corners are rounded or beveled, proceed as follows:
- On the line of the fastener from the corner, measure 5-10 cm and put a mark.
- We do the same on the bottom line.
- Connect the points with an arc or a straight line - a pencil of a different color.
Modeling the neck
In general, it is very useful to immediately understand what color is indicated on your pattern. The most obvious option is to outline the details of the base with a simple pencil, and new constructions that are already designed for the vest are colored. After all the changes have been made, it is necessary to circle all the contours of the vest with a colored pencil or even a marker, so as not to get confused.
So, we model the neck. It happens:
- rounded
- V-shaped;
- square.
Rounded neckline
A fairly common option, although it is not suitable for everyone. It is necessary to draw an arc that will run parallel to the existing neckline, but at some distance from it:
- Determine the depth of cut.
- Set this distance along the fastener line.
- Determine how much you need to expand the neckline from the back (you can deepen it by 5-6 cm, but you can leave it as it is).
- On the shoulder seams set aside the collarbones 2-4 cm (the distances should be the same on the shelf and back).
- Set aside the distance from the end of the neck on the shelf pattern and put a point.
- Connect this point with the notch depth mark with an arc, circle with a colored pencil.
- Do the same on the back - even if you leave the depth the same as it was, you shortened the shoulder seams, that is, the arc must be adjusted to new marks).
V neckline
The construction begins in the same way as in the previous case, that is, it should be noted:
- depth of cut in front;
- back cutout depth;
- length of shoulder seams.
The only difference is that on the shelf part the new marks are connected not by an arc, but by a straight line. But from the back side you need to draw exactly an arc.
Square neckline
This option has some specifics - you need to carefully control the angles. The process itself goes like this:
- On the part of the shelf, set aside the depth of the cut.
- Note how much the shoulder seam should be shortened - set aside the desired distance from the end of the neck.
- Draw a perpendicular to the point indicating the depth of cut, and set aside the same distance on it.
- Connect the marks.
- Check the angles - they should all be straight.
- Do the same on the back.
Important! The depth of cutout of the back is always less than on the shelf, regardless of what shape of the neck you choose.
We correct the armhole
The armhole needs to be expanded a little. She may be:
- rounded
- square.
Rounded armhole
The easiest option is to just deepen it slightly. To do this, you can do the following:
- On the side line of the front, set aside 2-5 cm from the armhole.
- Adjust the armhole line to this point so that the arc is smooth.
- Do the same on the back.
- Circle all the patterns with colored pencil.
We cut a vest on fabric
The details of the shelf and back are cut so that the side sections coincide with the shared thread of the fabric. In this case, two shelves should be obtained, since a fastener is supposed to be in front. The back is cut out in one piece. In addition, you must immediately think about how you will handle the fastener, neck and armholes.
For a classic vest fit details. Make them like this:
- Spread the fabric face down.
- Place part (e.g. shelves) face up.
- Circle the neckline and fastener line, as well as the shoulder seams.
- On shoulder seams set aside 2-3 cm.
- Through these points, draw lines that exactly follow the contours of the neck and fasteners - you should get a curved strip of the same thickness.
We sew a vest
The assembly order of the classic vest is standard:
- First, sweep the tucks in front and behind.
- Stitch them and iron them.
- Sweep and stitch the shoulder and side seams.
- Smooth out allowances on the sides and overcast.
- After that, you can start processing - if you use trim parts, fold them with the main front sides to each other, notice and sew on the edge.
- Bend the trim parts to the wrong side and iron.
- Do not forget to check the position of the shoulder seams - they must be the same for the cut and main parts.
- Designate areas for welt loops and buttons.
- Make loops (best if your machine can sew them, but if necessary, you can do them manually).
- Hem the hem.
- Sew on the buttons.
to contents ↑Important! If the vest is with a zipper, the procedure will be almost the same, only it is more convenient to sew a zipper before the neck is processed.
Vest without a pattern
If you feel sorry for throwing away your old denim jacket, which has badly frayed cuffs or torn elbows - well, it will still serve you. Ripping it is not necessary. In order for the jeans vest to look good, you will need dense fabric or leather - it is best to work on the neck and armholes with it; jeans fabric is quite difficult to hem carefully.
We proceed as follows:
- If possible, carefully evaporate the sleeves.
- Try on a jacket.
- We note the depth of the cut on the shelf and back.
- We remove the product.
- We adjust the cut line - it is necessary so that it turns out as flat as possible.
- We measure along the armhole the distance from the side to the shoulder seam along the shelf and back.
- We add another couple of centimeters (they can then be cut off) and cut out ribbons of the appropriate length from the skin.
- In the same way we cut ribbons for the neck - the strips should be so wide that they can be folded in half.
- We trim the armholes and neck with leather, on a typewriter or manually.
to contents ↑Important! Modern cars do not always take thick tissue, and especially skin, well, so care must be taken. But if your mother has an old manual machine on the mezzanine, in such cases she can very much help you out.
Stock footage
Cutting and stitching a vest is quite possible, even if you are just starting to do needlework. The most important thing to pay attention to is the accuracy of all operations. For such small products, this is especially important, because every uneven seam will be visible.
- How to choose a vacuum cleaner taking into account the characteristics of the house and coatings?
- What to look for when choosing a water delivery
- How to quickly create comfort at home - tips for housewives
- How to choose the perfect TV - useful tips
- What to look for when choosing blinds
- What should be running shoes?
- What useful things can you buy in a hardware store
- Iphone 11 pro max review
- Than iPhone is better than Android smartphones
Report typo
Text to be sent to our editors: