
How to sew a shirt for a boy with your own hands?
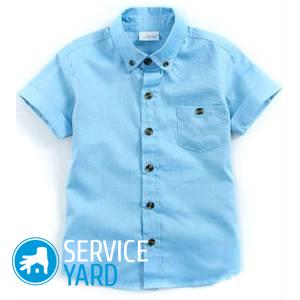
With a huge assortment of goods in the store, many consumers sometimes have problems with the selection of a garment. Each person has individual characteristics of the figure, which do not always fit into the generally accepted standard size framework. Especially when choosing clothes for children, one has to face a similar problem. Children grow individually and unevenly: in some - legs grow faster, others - very quickly stretch in growth. The disproportionality of the figure complicates the choice of clothing for the child. Many problems arise at the time of choosing the classic version of the shirt for boys, since in this case you have to take into account the height of the child, the width of the shoulders and waist, the size of the collar and the length of the sleeve. Sometimes it can be difficult to combine all these parameters. The most convenient option is self-tailoring of the shirt. About how to sew a shirt for a boy with his own hands, we will tell in this article.
to contents ↑Taking measurements
Children's shirt is much easier to sew than an adult product. Sewing a classic shirt does not require special skills, any beginner needlewoman can easily cope with a similar task.
To sew a classic version of a shirt for a boy, first of all, you need to take the necessary measurements:
- We find the size of the chest (Og.) For this, we place the centimeter tape at the level of the shoulder blades so that the centimeter passes through the armpits, and connect the edges of the tape on the chest. The tape should be free.
- We measure the distance that is between the two extreme points of the shoulders (D).
- We measure the distance from the upper vertebra of the neck to the end of the shoulder or to the point of the end of the shoulder suture (Shp).
- We find the distance equal to the width of the back of the neck (Shh.z.), which is measured around the circumference from the spine to the starting point of the shoulder suture.
- We also need the value of the sleeve length (Dp).
- Measure the waist circumference (From).
- Find the size of the half-circumference of the sleeve slot. To do this, the centimeter tape must be placed just below the armpit, then applied to the edge of the shoulder, at the point of placement of the seam of clothing (Pr).
- We determine the size of the collar (Psh), which is found by measuring the circumference of the neck from the top of the spine to the beginning of the collar.
- Measure the length of the product (Di).
to contents ↑Important! If your baby is a restless boy and cannot stand still for some time so that you can take measurements, then you can take any T-shirt that fits perfectly on your boy. To build a pattern for a children's shirt, you can take all measurements from it or circle some parts of a T-shirt.
The construction of patterns
To sew a children's shirt on a boy, it is necessary to build patterns of the following elements:
- back - 1 workpiece;
- shelf corresponds to 2 parts;
- the shoulder element - 2 blanks, this part connects the back and the shelf, so there is no seam on the shoulder;
- two blanks of sleeves;
- two gate details.
to contents ↑Important! Building a pattern of a children's shirt on a boy is a very simple procedure. The main condition is the observance of all sizes and the addition of allowances for bending and seam processing. In addition, you need to add a few centimeters for a double strip on which buttons or buttons will be located.The sleeve of a children's shirt can be either short or long - it all depends on your preferences and on the choice of material.
Cut shirts
In order not to encounter problems at this stage, consider these tips:
- When cutting all the details, it is necessary to check the direction of the shared thread, which on all workpieces should be located vertically, except for the collar.
Important! On this blank, the shared thread should be located across the shirt, since during the sewing of the gate it can be deformed.
- When cutting a shirt, try to place all the details rationally on the material panel, taking into account all the allowances for seams and hem. So, at the joints of the seams, it is preferable to lay about 1 cm, for bending the product, add 1.5-2 cm.
- If the parts are symmetrical, then in the midline the material needs to be folded in half, and then circle the workpiece. This procedure simplifies the task and helps to sew a baby product much faster.
- In addition, it is possible to simultaneously produce the same parts.
In order to transfer seams from one part to another, different methods can be applied. The most common include:
- Tapping method. On one blank, all contours are outlined with chalk, creating a very thick line. After - the parts are folded on the wrong sides and tapped around the entire perimeter.
Important! Using this method, all drawn notes are printed without problems on the second part of the product.
- You can use sewing pins, which pair the workpieces.
- When laying a buttonhole, the contour remains on the second workpiece.
- They also use a copy roller, the use of which is very convenient, especially when you have to sew a lot.
Sewing a baby shirt
After you have cut all the details of a children's shirt, the workpieces must be swept away in the correct sequence to avoid defects.
Consider the order of sewing a shirt for a boy:
- Fold on the wrong sides two blanks of the shoulder element, sweep.
- We sew two parts, overlay the edges with a zigzag or process overlock seam.
- We attach and attach shelves to the received part. Thus, the front part of the shirt for the boy is obtained, the edges of which are treated in the same way with a zigzag or overlock seam.
- To design the backrest, we first bast and iron the double fold, for this we make marks in the places of bends, then we stab with sewing pins, iron it for fixing. We sweep the edges of the parts, and then connect the back with the shoulder element. We sweep and sew details and process the edges of the seams.
- We combine the lateral edges of the blanks of the shelf and the back so that the base of the sleeves coincides. We sew the details of the product and process the slices. The basis of the children's shirt is ready!
- Now we iron all the connecting seams of the product. You can stitch them with decorative stitching.
- We turn to the design of the sleeves of a children's shirt. Since the shirt is for children and the sleeve is small, there is no point in immediately stitching the slices, after which it will be inconvenient and difficult to form a hem. Therefore, first of all, we process the slice and bend it. After this, we sew the sleeve, treating it with an overlock seam, then we turn the sleeve on the front side and iron the seam.
- With a thread with a needle, we sweep the main part of the children's shirt and sleeves, then we sew and process the slice, after which we iron the seams.
- The product is bent to the desired length, the edges of the shelves are also bent, after gluing this part with non-woven. As a result, we get a dense strip with a width of about 2.5-3 cm, the edge of which we build up and iron again.
- After processing the slices, we proceed to sewing the shirt collar for the boy. Since it should keep its shape, it should be glued with non-woven or cobweb.To do this, we fold the blanks of the gate with the front sides and sew all the slices, leaving the one that will be connected by the collar of the shirt unlocked. After that we process the edges. We turn the product door and glue the parts with a cobweb or non-woven.
Important! The contour of the gate of the main part of the shirt for the boy is cut so that the product looks neat and the seam is not overtightened. You should also very carefully handle the edges of the parts to be joined.
- Iron the seam to the inside, bend the second cut and sew again. Thus, the seam is hidden on the collar of the shirt for the boy and the product looks very beautiful.
- For beauty, you can use the decorative stitch, which is laid at a distance of 2.5-3.5 mm along the edges of the product.
Children's shirt is ready!
to contents ↑Important! The constructed pattern is suitable for both a summer shirt, and for a product with a long sleeve or for a more formal option. It all depends on your personal preferences and wishes.
Additional work
As a fastener for a shirt for a boy, you can use both buttons and buttons - it all depends on your personal preferences.
Buttons
Sewing buttons is easy. To do this, in the store we get the required number of buttons of the appropriate size and color. On the plank of the shirt, using a ruler, we make serifs at an equal distance from each other. Now it remains only to break through the loops and sew the buttons.
Buttons
To install the buttons, you must use a special press. The principle of application is as follows:
- Select the button of the required size.
- In the press holder we fix a special nozzle.
- Next, we install the upper part of the button and fix it on the shirt shelf.
Important! It is preferable to immediately install the same type of elements.
- We repeat the exact same procedure with the second part of the button.
- Then we check the coincidence of serifs with paired parts.
- After that, we fasten the children's shirt on all the buttons and make sure the procedure is done correctly.
to contents ↑Important! Presses are stationary and manual. Stationary presses have a significant advantage, which is that, having fixed the part, after installing the first element, you can immediately install the second part of the button. At the same time, you can immediately see where the second element should be attached.
Option 2 - detailed step-by-step master class
To sew a children's shirt for a boy, you must first prepare the following tools and materials:
- cotton fabric with a width of 1.2-1.5 m, with a corresponding length of 0.5-0.6 m;
- paper for a pattern;
- thread with a needle;
- sewing machine;
- ruler;
- threads matching the color of the selected material;
- thin non-woven, cobweb or doubler;
- scissors for fabric;
- chalk for cutting, a piece of soap or a simple pencil;
- sewing pins;
- five small buttons for a shirt;
- press for installing buttons;
- 5-6 buttons;
- iron.
Important! Before you start sewing a children's shirt, we wash the prepared material in warm water using shampoo or baby powder. After that, we dry and iron the fabric thoroughly. After this procedure, shrinkage of the material by 5-10% may occur.
Now, without any problems, we start cutting and sewing the product.
Step 1:
- Fold the prepared web along the shared thread in half so that the front side is inside, and we pin the pattern.
- We draw in chalk and cut out the required number of parts with appropriate allowances: two front halves, one back part, two coquette, two sleeves, two collars, one pocket.

Step 2:
- First, make out the bar for the fastener on the front parts of the product. To do this, smooth out the allowances by 1 cm on the wrong side, then smooth out another 2 cm.
- On the wrong side, close to the fold, using a straight stitch with a stitch of 3-3.5 cm, we trim the bar.
- Ready strips are steamed with an iron.
Step 3
We turn to the manufacture of the pocket:
- On the wrong side, on the upper edge of the pocket, smooth out 2 cm wide allowances.
- Smooth another bend along the edge of the cut, then attach it, back off about 0.5 cm from the edge, as a result, the cut should remain inside the allowance.
- Straighten the pocket, while folding fold down.
- On the wrong side of the pocket around the entire perimeter, we smooth over the allowances.
- With a needle and thread, we sew a pocket on a shirt shelf.
- Along the entire perimeter we attach the pocket at a distance of about 2 mm from the edge.
Important! When using a sewing machine, it is very convenient to use the “thread at the bottom” function, since during sewing, raising the presser foot, there is the possibility of turning the part at the corners of the pocket.
- After that, we sew the sewn pocket through the cotton material.
Step 4:
- The lower section of the coquette, when the front side is on top, is applied to the upper section of the back.
- The front side is also at the top and we cover with the second part of the coquette, while the front side is at the bottom.
- As a result, on a sewing machine, we sew two coquette blanks to the upper edge of the back so that there are allowances for the back between the two coquette.
- After that, we turn up the outer and inner parts of the coquette, while the allowances are between the coquette.
- Next, we sew along the front side with a straight line, while maintaining a distance of about 2 mm from the sewing line.
- The finished back of the product is steamed with an iron.
Step 5:
- We sew the details of the shirt along the shoulder seams, treat the allowances with an overlock seam.
- On the front part, we smooth out the allowances, and then close to the seam of the grinding we lay the fixing line.
Step 6
We turn to the design of the collar. Let's start with reinforcing the upper part of the collar with doubler. For this:
- On the horizontal surface, lay the blank of the collar with the wrong side up.
- Place a copy of it on top, which is cut out of doubler and place the adhesive part down.
- Gently cover with a thin cotton material, applying slow movements from the center of the workpiece to the edges, iron with an iron without steam.
Important! If the doubler failed to stick on the first try, then repeat this procedure again.
- We turn off the seam allowances along the lower cut of the upper glued blank of the collar and lay the fastening line.
- After that, we fold the collar details with the faces inward and sew along the perimeter, while leaving the lower edge not stitched.
- On the collar we cut off allowances up to 3 mm, then we make notches in the corners, after which we carefully turn the part out.
- We sweep the collar around the perimeter, and in such a way that there is no turning over of the sewing line to any side, but strictly along the bend line.
- Iron the steam with a steam iron over the collar through cotton.
- Sew the open edge of the lower part of the collar to the neck of the product.
- We sweep the upper part of the collar to the neck along the stitching line, while all allowances should remain inside the collar.
- On the front side, around the entire perimeter we build the collar, while observing a distance of about 2 mm from the edge.
- Through the cotton material we steam off the finished collar.
Step 7
Go to the sleeves:
- Sew sleeves to the armholes of the product.
- On the overlock we process allowances, after which we turn them to the side of the product.
- We fix with a straight finishing stitch on the front side.
- Steam the seams with an iron and steam.
- On the sleeve we make a false cuff, applying the same principle as when processing the upper cut of the pocket.
- On the wrong side, we bend the allowances on the sleeves that correspond to a width of 2 cm. After the cut, we bend again and attach a tuck of 0.5 cm wide, with the bottom cut of the sleeve inside it.
- At a distance of 0.5 cm from the lower cut of the sleeve, we additionally sew the finishing line.
- After that, we gently iron everything.
Step 8:
- Putting together the side seams and sections on the sleeves of the product, we make a comparison of the lines for attaching the sleeves.
- We sew with a common seam on a sewing machine, while processing overlock allowances.
- After that, we steam and smooth them on the back side.
- Along the seam of the sleeves, using a straight stitch, we fix the allowances.
- We bend the lower section of the product, smooth it on the seamy side, first 0.5 cm, then another 1 cm. In this case, you need to stretch the material a little on bent sections, otherwise, oblique creases form on the bend.
- We fix the bottom edge of the product with a straight line so that it is close to the fold.
- After that, we fine-tune everything well.
- To the armholes of a shirt that has not yet been sewn along the side seams, we sew on the sleeves.
- We bend the lower section of the shirt and smooth it on the seamy side, first by 0.5 cm, and then by 1 cm. At the same time, the fabric should be stretched a little on curved sections so that oblique creases do not form on the hem.
- We fix the bottom edge of the shirt with a straight line close to the fold and smooth it well.
- On the left side of the bar we mark out the loops: the first horizontal loop on the collar, the second vertical - at a distance of 3 cm from the collar, the remaining vertical loops on the bar at a distance of 7 cm from each other.
- The finished loops are steamed from the wrong side with an iron.
Important! To make loops, it is convenient to use a special foot for the sewing machine and the “automatic buttonhole” function.
- Sew buttons on the right side of the shirt opposite the buttonhole. In this case, the two sides of the plank need to be chopped with pins and buttons to sew in the center of each loop.
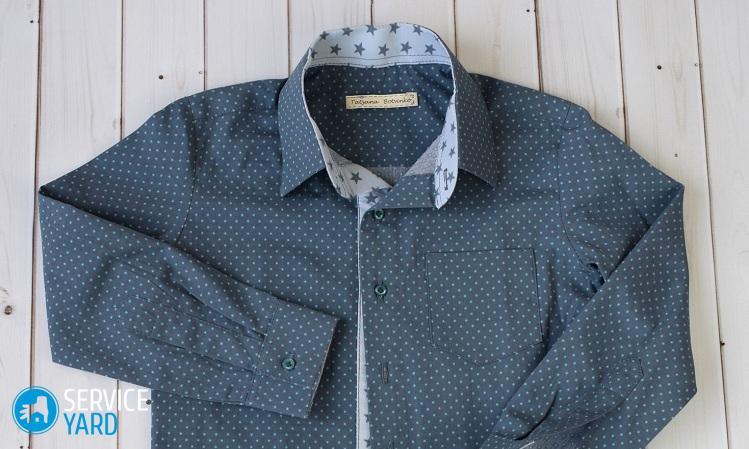
A light summer shirt with funny little animals for a little boy is ready!
to contents ↑Stock footage
Of course, in order to sew such clothes, you will have to work hard, spend time, be very careful and accurately perform measurements, calculations. But having done all this work, you will be sure that the thing will sit on your child like a glove, and it will cost much cheaper than the purchase.
- How to choose a vacuum cleaner taking into account the characteristics of the house and coatings?
- What to look for when choosing a water delivery
- How to quickly create comfort at home - tips for housewives
- How to choose the perfect TV - useful tips
- What to look for when choosing blinds
- What should be running shoes?
- What useful things can you buy in a hardware store
- Iphone 11 pro max review
- Than iPhone is better than Android smartphones
Report typo
Text to be sent to our editors: