
Attaching the sink to the bottom of the countertop

All modern sinks according to the type of placement on the washing table are divided into built-in and overhead. At the same time, the surface of the sink itself may be below the level of the desktop, above the plane of the countertop or be flush with it. But be that as it may, the bowl under the mixer should be mounted between those parts of the kitchen set that are intended for serving dishes, cooking and placing dirty dishes. The cabinet to which the sink is attached, as a rule, is a separate element of the kitchen interior. Integrated and mortise sinks are installed in the continuous working surface of the floor modules. In this article we will talk about how the sink should be attached to the countertop from below, from above or flush, how to properly install such structures.
to contents ↑Mounts for modern sinks
The attachment for a sink to the countertop in the case of a mortise model should be as reliable as possible, so that when installing the sink bowl is well fixed. This type of mounting hardware greatly simplifies the installation and subsequent disassembly of the sink. We will consider it further.
Features of fasteners and the main purpose
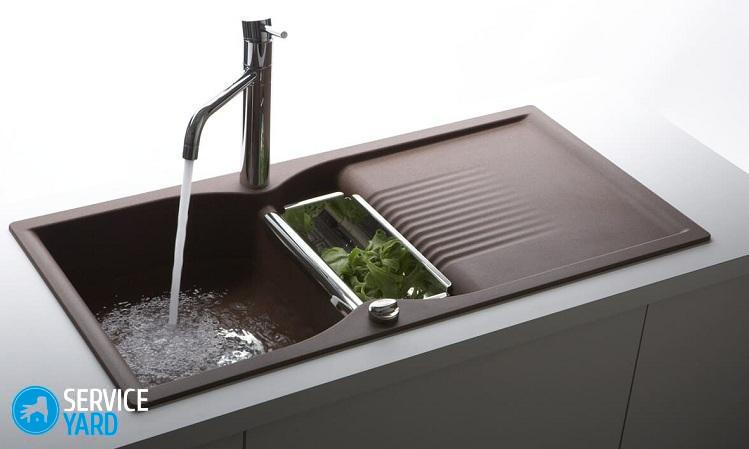
Overhead and mortise sinks almost replaced other models of kitchen sinks due to their practicality, beauty and ease of use. This type of plumbing is ideal for installation in non-standard modern countertops, involving maximum integration into the general ensemble of the interior of all household appliances. Its main feature is that in the visibility zones and on the surface there should not be any traces of fasteners, cracks or gaps. So, in order to implement this requirement, you will need reliable hidden fasteners, which simultaneously imperceptibly and reliably can hold the bowl of the sink in the countertop.
Mounting device:
- The fastener consists of two main elements and a clamping screw.
- The lower part is mounted in special holes or slots to the sink apron.
- The upper part cuts into the countertop with special teeth.
- All elements are connected to each other with a screw.
- All parts have a swivel, the upper part can be bent relative to the lower one at your discretion. It is thanks to this feature that you can first bend the teeth inward, then insert the sink into the hole, and only then bend them again and firmly rest on the board.
Important! Fasteners may consist entirely of metal parts or have inclusions of plastic. All-metal clamps are considered the most reliable.
Even if you use an all-metal casing, it is recommended to tighten all screws only by hand, because the thread on the washer is too fragile and can be easily torn off with a screwdriver.
Is mounting possible without clamping?
It so happens that the fixtures for the kitchen sink are lost during transportation or simply not suitable for a particular countertop in size due to its too large thickness. It is difficult to find a way out in such situations, but still it is real.
There are several solutions to this problem:
- Fix the sink with sealant or glue.
- Independently make the fastening of the parts for the installation of gypsum plaster.
Adhesive mount
Given the fact that the sinks are laid on top of the hole and rest on the countertop, we can say with confidence that the entire load falls on the bowl, under the arising forces it is pressed even harder. But sometimes there is a gap between the board and the sides. So, if you install the sink on the glue and press for some time to solidify with a load, then the gap will be minimal, the fixation in turn is reliable.
Important! The biggest problem with glue is the impossibility of simple and quick dismantling of the sink in case of repair or replacement of the mixer.
GKL mount
You can use the remote mount and cut it into several parts. The antennae are simply brought into the mount on the sink, self-tapping screws are inserted through one of the holes at an angle and attracted to the countertop. Due to this, an attractive force arises, the fastening is durable and reliable.
to contents ↑Important! Screws can only be screwed into worktops made of wood. Polymer, composite and stone products are completely unsuitable for this method, only the use of dowels is appropriate here.
Mounting the sink
Overhead types of sinks can be called the simplest in terms of installation. This is a traditional installation of equipment for washing dishes. In the interior, such products are freestanding tables, complemented by a panel for folding already clean kitchen utensils.
Installation is as follows:
- Before attaching the sink, a mixer, siphon and water hoses are mounted. The overhead design is fixed with fasteners with an oblique slot. Then, self-tapping screws are screwed into the mounting points previously marked on the inner surface of the cabinet. This should be done with a screwdriver, while the screws should protrude from the walls of the underframe by 5 mm.
- The mounting grooves are mounted on self-tapping screws, the sink must be shifted to its stable fixation. With the help of fixing brackets, the panel is fixed on the pedestal or pushed into the grooves on the base using special slides. Often a tubular adhesive sealant comes in the kit, which is inserted into the groove on the panel.
Important! The hole between the sink and the cabinet is lubricated with sealant to prevent moisture from entering.
- Supporting bars are installed under the sink in order to increase the structural strength. The underframe itself remains open for cleaning the siphon, sewer and repairing piping connections.
- At the last stage, it is necessary to tighten all the screws, remove the sealant that protrudes at the joints.
Installing a mortise sink
The sink itself can be made of porcelain, stainless alloy or earthenware. Installation of a mortise sink begins with cutting holes in the countertop.
To install such a container, prepare the following materials and tools:
- Electric jigsaw with a fine saw.
- Screwdriver, drill.
- Ruler, pencil, tape measure.
- Silicone sealant, self-tapping screws.
- Spanners.
- Construction knife, sandpaper.
Mortise installation diagram:
- Mark the contours of the mounted panel with a pencil, for this, turn it over and lay it on the countertop. The margins from the edges should be at least 5 cm.
- Measure the location of the bowl relative to each edge of the panel. You should have a contour of the hole that you cut out under the sink.
Important! It is necessary to transfer the contours of the sink to the surface of the countertop as accurately as possible. The line along which you will make the cut should deviate from the sides outward by 1 cm.
- Drill a hole in one of the contour points to insert a jigsaw blade into it. If the bowl has a rectangular shape, then the holes are drilled in the corners of the resulting contour.
- Glue masking tape on the outside to protect the surface from damage when sawing.In the process of cutting the necessary opening, screw the screws to a shallow depth so that the inner part does not fall out during operation.
- Seal the ends of the tabletop with sealant strictly along the cut to protect the material from moisture. It must be applied along the edges of the panel along the drawn outline.
- Insert a sink with a built-in siphon and mixer into the finished opening, attach it to the countertop with clamps.
- Connect the mixer to the water supply, draining to the sewer through a siphon.
Mounting an integrated sink
Now we will consider how to attach the sink to the countertop flush with it, to make its use comfortable, to maximize the aesthetic perception of the entire structure.
Important! Installation of mortise sinks does not require high-quality processing of slices, because they are not visible under the panel. In the case of integrated bowls, it is recommended to do this carefully to get a perfect result. Only compliance with this condition will ensure maximum tightness of all joints and an unsurpassed decorative look.
In addition to the bowl, for installation you will need a special milling machine and a little experience with it. Also, to process the edges of the opening, prepare a cutter to select quarters.
Follow the instructions below:
- Make a template from plywood to make the correct configuration of the slices.
Important! You can make a cutout the same way as for a mortise sink, only a little less, considering the side, which then completely hides in the canvas.
- Select the fold along the edge of the opening to a depth corresponding to the height of the side and the width, which is equal to the fit of the edges of the sink.
- Thoroughly clean the cut surface.
- Put a layer of sealant on the worked-out shelf, establish a bowl.
- After the seal has dried, fasten the sink with the clips.
Stock footage
If you want to decorate your kitchen with a beautiful set consisting of individual elements, then the option of a table with a false sink is more suitable for you. The floor-mounted furniture module with a solid worktop fits perfectly with integrated models. In any case, remember the main rule: fasteners for the kitchen sink should be as strong as possible, reliable, high-quality, easy to install.
- How to choose a vacuum cleaner taking into account the characteristics of the house and coatings?
- What to look for when choosing a water delivery
- How to quickly create comfort at home - tips for housewives
- How to choose the perfect TV - useful tips
- What to look for when choosing blinds
- What should be running shoes?
- What useful things can you buy in a hardware store
- Iphone 11 pro max review
- Than iPhone is better than Android smartphones
Report typo
Text to be sent to our editors: