
DIY changing table
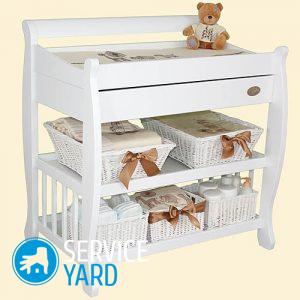
By the appearance of the child, not only a crib is needed. You also need to purchase a changing table or chest of drawers, on which it will be convenient to swaddle and change clothes. But it’s not at all necessary to run to the store for this thing, because the children grow up very quickly and such a table will only come in handy for several months. That is why in this article we will tell you how to make a changing table with your own hands. This process does not take much time and will give you the opportunity to significantly save money.
to contents ↑Important! When a table is not needed, it can be removed and put away to the place where it will not bother you. The relatively small dimensions of the baby changing table make it even more convenient. Moreover, he will perform all the necessary functions, and the height of his sides will not allow the baby to slide down and prevent a fall.
Table design
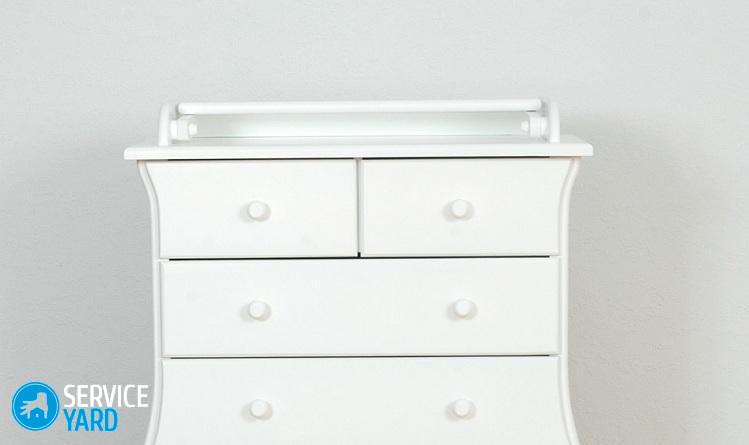
At the heart of such a table is a countertop, which can be fixed on a pedestal or on a chest of drawers. You do not need to further process the chest cover. Also, a changing table can be attached directly to the crib. Fixing with the help of reliable metal corners will allow you to practically strengthen the table on a piece of furniture that is convenient for you without the need to drill a surface.
Important! The chest of drawers will be useful because hygiene items and children's items can be stored in its drawers.
Such a design can be made of any size, but the following are considered the most optimal:
- Worktop - 785 by 805 mm. It needs to be fixed using the holes that are made on the back wall and on the sides.
- The back wall is 100 by 772 mm.
- Side sides - 350 by 815 mm. They need to do 2 pieces.
- The front bar is 350 by 815 mm.
- Legs - 40 by 600 mm. They will need to be attached to the side walls.
Important! The screed, which is located under the bottom of the table, will help to give the product stability.
The above sizes can be changed at your discretion. As a rule, a changing table is made for some kind of furniture. Therefore, the size of the bottom should be consistent with the top cover of your dresser or bedside table.
to contents ↑Materials and tools for work
To make a changing table with your own hands, you need to prepare the following materials:
- Pine or linden board 22 mm thick, 250 by 10 cm in size.
- 1 plywood sheet with a thickness of 0.8 mm.
- 2 wooden beams with a section of 40 by 20 mm and a length of 600 mm.
- Glue for wood.
- 8 metal corners for fastening.
- Furniture foam rubber 25 mm thick.
- Children's mattress.
- Waterproof fabric.
- Paint or varnish.
In addition, you should stock up on such tools:
- Network drill with wood drills.
- Jigsaw.
- Horizontal milling nozzle or machine.
- Clamps.
- Roulette.
- Sandpaper.
When all of the above has been prepared, you can begin to assemble the baby changing table. But it should be borne in mind that before starting work, all elements and workpieces must be carefully sanded so that there are no bumps or burrs.
to contents ↑Important! Try to choose the most reliable mounts. In the manufacture of children's furniture precautions are not superfluous.
Preparation of blanks:
- First you need to make markup on all elements. It is carried out taking into account all sizes. The edges of the components should preferably be placed so that they coincide with the edges of the wooden board.Thus, you can save material, and cuts will have to be done much less.
Important! Initially, all the edges of the cuts are processed with coarse sandpaper, and then fine-grained.
- Now you need to make the grooves. They need to be made in the back wall and sides in order to fix the countertop. Their sizes will depend on how thick your board is. If the changing table is done according to the above dimensions, then the grooves are made 8-9 mm wide and 7-8 mm deep.
Important! The grooves are placed approximately 2 cm from the bottom of the parts.
- For fastening the front strip, it is necessary to make cuts with a length of 5-7 mm. For these purposes, you need to make markings on both sides, located 2 cm from the edge.
- It is also necessary to make a backup for the bottom of the structure. A groove of 1.5 by 0.7 cm is performed along the entire length of the element. The edges need to be rounded.
- Now we form places for fastening. To do this, nests are drilled for fastening the elements with each other. In the sides, you need to drill non-through grooves so that about 3-5 mm are left.
Important! The spike must not pass through the part, otherwise it may injure the child.
On each of the side elements it is necessary to make such nests:
- For fixing to the back wall - 3 pcs.
- For fixing the legs - 4 pcs.
- For fixing with the front wall - 1 pc.
to contents ↑Important! Then you need to make the corresponding grooves in the front wall, back wall, legs. The depth here will depend on the length of the spikes. Often they are drilled 3 mm deeper than the fastening length.
Changing table assembly:
- First you need to attach the legs to the side elements. Glue should be added to the holes intended for the spikes with a cotton swab or a dispenser. Then insert the spike into the socket and drive it into the groove, gently tapping with a hammer.
- Next, you need to insert the free edges into the holes that are made in the legs (they also need to be lubricated with glue). Pull off the elements with a clamp and leave it until the glue completely dries.
- In the same way, lubricating all holes for fasteners with glue, it is necessary to assemble the remaining structural elements. First put the back wall on the countertop, then insert the panels into the holes in the back wall and the screed wall. Next, assemble the countertop, sides and back wall.
Important! First, it is recommended to form the left side of the table, then the right. At the same time, the legs are fastened with a screed. Then the front panel is fixed.
- Now the changing table is pulled together with clamps and left until it completely dries. Metal corners are screwed to the structure so that they become limiters.
Important! If such a table is installed on the chest of drawers, then the corners will not move.
- At the very end, you need to glue a softener on the countertop and fix the fabric, putting a children's mattress on top.
Stock footage
Do-it-yourself changing table is a very useful thing that will facilitate the life of mom in the first months of the baby's birth. Making this useful piece of furniture will not take you much time. As a result, you will get a practical thing, saving money on buying a product in a store.
- How to choose a vacuum cleaner taking into account the characteristics of the house and coatings?
- What to look for when choosing a water delivery
- How to quickly create comfort at home - tips for housewives
- How to choose the perfect TV - useful tips
- What to look for when choosing blinds
- What should be running shoes?
- What useful things can you buy in a hardware store
- Iphone 11 pro max review
- Than iPhone is better than Android smartphones