
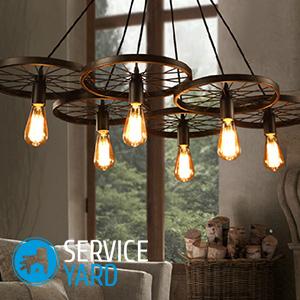
Paint Chandelier Lights

Your old chandelier has served you faithfully for many years, but has long lost its presentability, has become unfashionable, the paint on it has deteriorated, has it ceased to please your eye? Of course, you can buy a new lamp, but not the fact that it will completely suit you in terms of price and external performance. The quality of modern lighting devices is often upsetting - they are much inferior to the old technology that has been tested over the years. In this situation, you can try to update the lamp, for example, you can paint the ceiling for a chandelier or rag lamp shade yourself. How to do this correctly, what tools and materials to use - will be described in this article.
to contents ↑Updating an old chandelier with paint
What are the options for updating the chandelier? There are many ways, you can paint white and gold or upgrade shades, create a new one or refresh an old lampshade, make something completely new from an old lamp. By painting means updating the main color, painting glass, plastic or ceramic shades.
Important! It is better to stain in several layers, and fix the finished work with varnish.
Advantages of staining:
- You can choose any shade, taking into account individual preferences and tastes, the color scheme that prevails in the existing interior.
- As soon as you get bored with the new color, you can easily repaint the ceiling.
- If the result does not suit you, then you can simply throw away the old chandelier. But this is an extreme measure.
What materials are necessary for coloring?
Today, there are a lot of options for coloring compounds that can be used to translate your ideas into reality at home.
You will need the following materials and devices for work:
- Primer. You can use an acrylic primer or a primer specifically designed for metal surfaces.
- Spray acrylic paints. The choice of shades and colors of these compounds is simply huge, you can find even the most unusual variation.
- Clear acrylic varnish. It allows you to protect the paint from various damage, gives depth to the new color, the coating will begin to shimmer and shine beautifully.
- Gloves and respirator. Their use is mandatory when performing such procedures, because your health is at stake.
- Solvent. You will need it to degrease the surface of the ceiling before painting.
- Cotton clean, dry rags or cloth.
- Screwdrivers. Useful for removing all removable parts from the chandelier.
How to prepare a chandelier for painting?
Of course, before you paint the ceiling of the chandelier with your own hands, they must be prepared. A workplace is best organized outdoors.
Do the following:
- Hang the chandelier on some hook, or pull the rope - you can use the Swedish wall for children, the ceiling in the gazebo or a branch.
- Cover the floor directly beneath the work area with something to prevent it from getting dirty with paint drops.
- Remove all bulbs and fixtures from your chandelier. If some element that you do not plan to paint is not removed, then simply cover it with plastic wrap or masking tape.
- Thoroughly clean the chandelier, remove cobwebs, dust, dirt, any impurities so that they do not remain under a paint layer forever. Wipe it with a dry cloth first. Wash parts that require more thorough cleaning with a damp cloth and mild detergent. Let it dry completely.
- The entire surface should be degreased, for example, with kerosene or acetone.
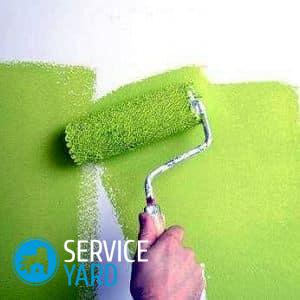
Chandelier Painting
To paint a chandelier from a spray can, in fact, is very easy, the main thing is to strictly follow the recommendations of specialists and instructions.
Paint according to this pattern:
- To get the perfect result, immediately before applying the paint, spray the surface with an aerosol primer. It is recommended to apply it from top to bottom with wide strokes directly from the spray can. It is better to apply several thin layers.
Important! The spray can must be kept at a distance of 20 cm from the structure, otherwise - the primer will begin to leak. If suddenly this happens, first let it dry completely, then sand the smudges with fine emery paper and prime it again.
- Before painting, shake the spray can thoroughly so that it mixes properly and has an ideal consistency. Apply it with sweeping movements, paint from top to bottom so that smudges do not form.
- Paint the surface in several layers, each of which should dry well before applying the next layer. Modern formulations dry in 20-30 minutes. Determine the number of layers yourself. If you evaluate the result and understand that one more layer is not enough to get a more saturated and deep color, then feel free to grab the spray can and apply the paint again.
- To protect the painted surface and give the color shine and depth, apply acrylic varnish on top. It should dry for at least 2 hours.
- Make sure that the paint and varnish are completely dry, the chandelier is no longer sticky, remove the protective film or masking tape.
- Assemble the product back, return all the removed bulbs and parts. Install an updated chandelier in the house.
If you understand how to paint the chandelier, clearly follow the proposed scheme, react to the work creatively, then the result will surprise you, and the process itself will bring a lot of positive emotions and pleasure.
to contents ↑Ceiling upgrade options
Preserved in excellent condition plafonds can be revived using various decorative techniques. The choice of a specific option depends on what materials you have at hand, your imagination and preferences.
For decorating shades, you can use the following materials:
- Beads, beads.
- Lace.
- Ribbon, fringe, braid.
- Feathers and furs.
- Ready made butterflies and artificial flowers.
- Paper napkins, petals, shreds of fabric.
- The wire.
- Decorative chains.
- Laces and yarn.
Take the old ceiling as a basis, then work on one of the proposed schemes, choosing the right materials for decoration.
Important! You can completely cover the base with decorations or lay out some kind of pattern or ornament.

New lampshade for yarn lampshade:
- For work, prepare PVA yarn and glue.
- Then inflate the balloon to the required size, pour a little glue into a small container.
- Pass each thread of yarn through a bowl of glue, then wrap them tightly around the ball.
Important! Make sure that the winding is uniform on all sides.
- Let the structure dry, then pierce the ball and remove from the resulting fabric lampshade.
- Decorate the ceiling with bright ribbons, beads or fringe.
Original lampshade made of wire
Build a wire frame, cover it with your chosen material, such as a vine, cloth or paper. The main thing here is not to forget about fire safety, so give preference to raw materials that are resistant to high temperatures. Decorate the lampshade with painting or other decorative elements.
to contents ↑Stock footage
You now know how to paint the chandelier with your own hands, ennoble the old lampshade or create a new one, so do not even doubt that you will be able to reanimate your old lighting devices. The update process itself is an exciting and creative exercise. The main thing is to show your creative thinking to the maximum. Naturally, it does not hurt to get acquainted with ready-made ideas that have long been embodied in life.
Report typo
Text to be sent to our editors: