
DIY kitchen repair
The kitchen is one of the rooms in which the most difficult to make repairs. This is due to the fact that this room is constantly exposed to sudden changes in temperature and high humidity during cooking. In addition, various communications and equipment are concentrated in the kitchen, which further complicate the work. Accordingly - do-it-yourself kitchen repairs must be done carefully and with all responsibility, since not only the appearance of the entire room depends on this, but also your safety. Therefore, in order for everything to work out qualitatively, we bring to your attention the main tips and recommendations that will help and facilitate the process of improving the kitchen.
to contents ↑The main difficulties of repairing the kitchen
During the preparation for the repair work in the kitchen, it is very important to take into account all possible difficulties in advance so that in the future they will not catch you by surprise:
- High humidity due to fumes due to cooking;
- Large temperature differences;
- The presence in the kitchen of several heat sources at once;
- Aggressive atmosphere due to the evaporation of fat during frying;
- Sharp and frequent changes in the above factors;
- The presence of gas appliances in the kitchen;
- High and frequent use of the kitchen;
- Small area;
- The constant presence in the kitchen of fragile and fragile items.
What is the best way to start repair work in the kitchen?
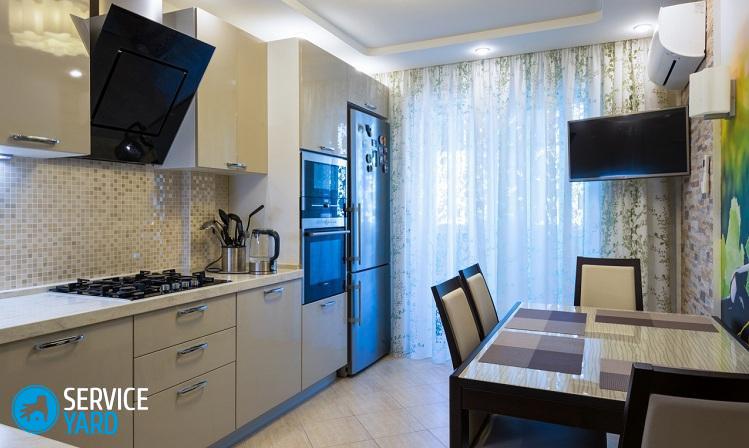
Since the kitchens in most houses are small, the owners of such premises have to dodge in attempts to equip this room. Thanks to modern technology, this process is greatly simplified, as built-in kitchen furniture and household appliances come to the rescue.
In order for the kitchen layout to be successful, it is very important to know the exact dimensions of the room. To do this, arm yourself with a tape measure and get to work. You need to make such measurements:
- Width and height of the kitchen;
- Dimensions of door and window openings (if there is a mezzanine, it should also be measured);
- The distance from the floor to outlet groups.
Important! The parameters must be measured exactly up to one centimeter, since the quality of further work and the finished result depend on this.
After you have completed all measurements, you should immediately think about which kitchen set and other furniture you plan to purchase, whether standard options are suitable for you, or is there a risk of ordering an individual manufacture.
Important! Today on the Internet there are many online 3D modeling programs, thanks to which you can pick up the required number of kitchen cabinets, as well as arrange them.
In addition, when arranging a kitchen, you should be aware that modern designers have coined the term “functional triangle”. This means that the refrigerator, sink and stove are located in the kitchen in an accessible vicinity. The width of each element in this case should not exceed 1.8 meters.
The process of repair work in the kitchen is divided into several stages. Therefore, further we will talk in more detail about each of them.
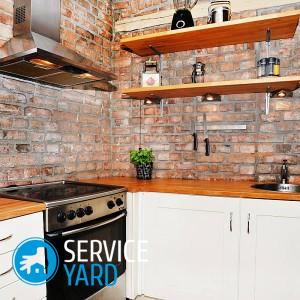
to contents ↑Forced hood installation
A range hood is a great option for a kitchen. Unfortunately, its improper installation can completely disrupt the ventilation system of not only your apartment, but also the neighboring one. Therefore, in order to avoid this, you will have to make a conclusion directly to the communal ventilation.
Important! Forced installation of the hood belongs to the subcategory of redevelopment, so before you start this process, you must definitely take permission.
The process should go very carefully and scrupulously, since it is impossible to get construction debris into the ventilation shaft.
Important! If the kitchen has a separate ventilation stroke, you can punch an outlet several centimeters below the main one.
In order to break through the ventilation outlet in the kitchen so that half of the house is not in the ventilation waste, it is very important to observe the following course of work:
- Measure the center of the future outlet. Drill a hole in it and drive it into the dowel.
- Insert a screw into the dowel. Tie a rope to it, and secure the free end a little higher.
- Drill holes along the contour of the future vent every 5-10 millimeters.
Important! Drill holes should be according to a previously prepared template.
- Between the holes, chop the master keys to a depth of 1.5 centimeters.
- Use a vacuum cleaner to remove building dust. This should be done as often as possible during the entire process.
The above manipulations must be performed until the piece of concrete you have selected falls off and remains hanging on a rope.
to contents ↑Important! Pay attention to the fact that it is strictly contraindicated to combine the outlet from the gas column and ventilation in the kitchen, as this is explosive.
Installation of communications in the kitchen
Communications in the kitchen are its main elements, since not only the aesthetic appearance of the entire room, but also its functionality depends on their well-established work. Therefore, we offer you some tips that will be useful to you while you work.
Gas pipeline
The main task here is to hide the gas riser, which hangs directly on the wall. To do this, you can use a flexible hose, the length of which should not be more than 4 meters. It is also allowed to lay all gas utilities right behind the kitchen furniture, except for the washing machine. This is due to the fact that during the spin cycle it creates vibrations, thus there is a risk of damage to the pipes.
Important! In a horizontal plane, the hose must never be bent.
Wiring
In standard kitchens, very often there is one or two outlets, which are often located in the far corner. Therefore, it is worth taking care to make a separate line located in the working area of the kitchen:
- An electric oven or stove, as well as a washing machine, must be grounded.
- The line that is reserved for these devices should not connect anyone else.
- As for the wiring itself, try to choose a three-wire cable that is protected by double insulation.
- The braid must be rigid so that the wires do not sag in the future.
Important! The wire is best laid directly from the junction box, as it is much safer. When carrying out all work related to electrical wiring, the room must first be de-energized.
Water pipes
This is an important component of every kitchen, since absolutely nothing can be done without water. Therefore, to begin with, you need to choose pipes. They are:
- cross-linked polyethylene;
- metal-plastic;
- from polyvinyl chloride.
All these types of pipes have a number of advantages. However, metal-plastic is quite fragile, but cross-linked polyethylene is very expensive. Therefore, the best option for the kitchen will be the use of PVC pipes. As for the runoff from the water supply, it can be hidden in a box of drywall.
Important! To make pipes less visible, consider wiring them in advance.
Sewer system
The main principle of installation in this case is that the shorter the pipe, the better. This is due to the fact that over time, the inner surface of the sewer is overgrown with grease and soapstone. Therefore, when making repairs in the kitchen with your own hands, the sewers must be installed as short as possible so that there are no problems with their cleaning.
to contents ↑Important! The diameter of the sewer in the kitchen by all standards should be at least 50 millimeters.
Repair Work
All repair and construction work in the kitchen always begins with cleaning surfaces from old coatings. This is due to the fact that in this room the walls and ceiling are deeply saturated with grease and fumes, therefore, in this case, simply washing them does not work.
Important! The flooring in the kitchen also needs to be removed in order to make a new screed. And in order to facilitate their work, the old coating needs to be well wetted with water.
After you have removed the old decorative finish in the kitchen, all surfaces must be washed with a solution of water and detergent. You can also add a tablespoon of vinegar to it for greater effectiveness. Wash best with a foam sponge.
Important! During operation, try to change the solution as often as possible.
At the end, walk again with a sponge dipped in clean water, and treat the already clean surface twice with a primer with bactericidal additives.
Floor and ceiling treatment
When making repairs in the kitchen with your own hands, it is very important to pay special attention to the flooring and ceiling, since the foundation needs to be properly prepared for these sections of the room. Regarding flooring, you need:
- Fill cracks with a width of more than 2 millimeters using a cement-sand mixture for these purposes.
- Close up intersecting cracks, especially if they are located in the future locations of the furniture.
- Align all sags, troughs and potholes.
- Remove differences 5 mm high.
The ceiling, in turn, is the most polluted place in the kitchen, since all the burnt and grease settle on it. Therefore, at the beginning of all the work, you need to revise the seams and remove the old wiring from them, clean them of debris and seal with foam.
to contents ↑Important! Unlike flooring, the alignment of the ceiling in the kitchen has no reason. This process will take a lot of time, and it will fly you such a pleasure into a considerable penny. Therefore, it is best to use suspended structures.
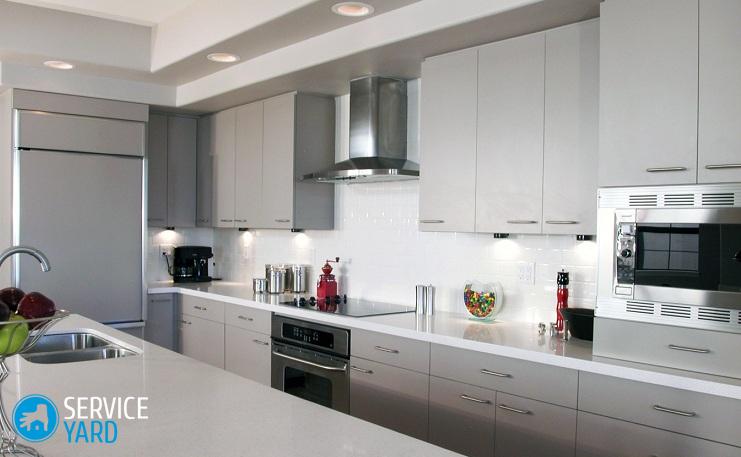
Finishing kitchen surfaces
Finishing decorative finishing of surfaces in the kitchen is always necessary in the following order:
- Ceiling.
- Walls.
- Flooring.
Finishing the ceiling
When starting to install ceiling structures in the kitchen, it is very important to take into account the fact that the finished surface must meet a number of requirements:
- Resistance to high humidity and temperature difference;
- Do not change color under various factors for a long period of time;
- Do not skip the fumes and vapors that occur during cooking;
- Ease and simplicity in leaving;
- Ease of dismantling in case of damage.
Therefore, the choice of materials is quite small. To finish the ceiling in the kitchen, you should pay attention to:
- PVC panels;
- Laminate with impregnation of PVA emulsion;
- Lining with PVA impregnation;
- Drywall.
It is also worth taking care of the crate, since you can not do without it. You need to make it from a wooden bar or a metal profile.
Important! If there are deep dips on the rough surface, they should be filled with foam.
It is very important to make slots in the profiles for wiring in advance. Thus, it will be laid in the strobes.
Important! Try to avoid a large number of spotlights, so that the burnout does not enter the space between the finish and the rough coating.
You can fix the grate with glue or with a stapler.The most important thing is to pre-treat each part with sealant. It is not recommended to paint the finished design, since more than one coloring composition does not withstand the conditions of the kitchen and begins to lose its color after 2-3 years.
Decorative wall decoration
Despite the fact that tiling is considered generally accepted as wall covering in the kitchen, this material is not welcomed by designers. This is due to the fact that dirt gets into the seams, as a result of which a fungus arises in them. Therefore:
- It is best to select the working area in the form of a kitchen apron with tiles, and treat the seams with an antibacterial agent.
- Washable wallpapers will be the best option for the rest of the kitchen. They are best glued already at the very end of all work after you finish the ceiling and floor.
Important! If you choose wallpaper green or yellowish tones, the degree of burnout will be almost invisible.
Fine finish flooring
As with walls, it is better not to use tile in this case. In addition to the formation of fungus in the joints, this material is also quite slippery and hard. Porcelain tile and parquet board are expensive materials that not everyone can afford. Therefore, the most optimal option for the kitchen will be a moisture-resistant laminate and banal linoleum, which has a huge number of advantages in relation to others:
- Does not require a perfectly smooth rough surface;
- Due to the dynamic elasticity does not allow to break the fallen dishes;
- Able to withstand prolonged contact with an open flame;
- Not afraid of water treatment;
- It has high performance and is resistant to abrasion;
- Flooring occurs without prior fitting and installation.
to contents ↑Important! Also, do not forget about skirting boards, as they carry not only a decorative, but also a very practical function. The skirting board protects the gap between the floor and the wall from moisture and burning, and also provides maximum tightness. You can fix it using self-tapping screws or “liquid nails”.
The most common mistakes made during repairs in the kitchen
Making both expensive and cheap repairs in the kitchen, many owners step on the same rake, making common mistakes. So that you are not among them, we will tell you what you should not do when making any repairs in the kitchen:
- Lack of a general idea of what the kitchen should look like, as well as a clear plan of action;
- A small number of outlets;
- Lack of a geyser and hood in the kitchen project;
- Incorrect calculation of the required amount of materials;
- Installation of valves in hard-to-reach places;
- Wrong procedure, for example, when the ceiling in the kitchen is done after leveling and painting the walls;
- Poor protection of surfaces from getting into the cracks of debris and grease;
- Incorrect layout, for example, peninsular in a kitchen with a small area;
- Laying a conventional laminate in the kitchen;
- Use of ordinary paper wallpaper;
- Acquisition of equipment after the complete arrangement of the kitchen;
- Weak exhaust power.
Stock footage
Repair in the kitchen is a rather serious undertaking, which requires scrupulousness and proper preparation. Therefore, starting this process, you need to plan everything properly, because the functionality and convenience of the room, its aesthetic appearance and the integrity of your wallet depend on this. We hope that this article will help you make high-quality and stylish repairs in the kitchen, which will please you for more than one year.
- How to choose a vacuum cleaner taking into account the characteristics of the house and coatings?
- What to look for when choosing a water delivery
- How to quickly create comfort at home - tips for housewives
- How to choose the perfect TV - useful tips
- What to look for when choosing blinds
- What should be running shoes?
- What useful things can you buy in a hardware store
- Iphone 11 pro max review
- Than iPhone is better than Android smartphones
Report typo
Text to be sent to our editors: