
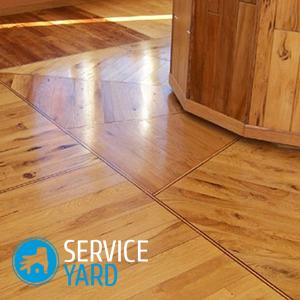
Laying laminate diagonally
Nowadays, laminate flooring is the most common and practical type of flooring. It has a huge number of advantages: appearance, durability, ease of installation and affordable price. Most often, this type of flooring is laid horizontally. This method is also indicated on the instructions that come with the packaging of the laminate. Undoubtedly, this is a good option, and especially if there are no problems with the layout of the room and the error is several degrees during installation. In rooms where there are ledges and uneven walls, as well as to give the room a charm and an unusual appearance, diagonal laying of the laminate can be used. How to do this - we will tell you in our article.
to contents ↑Advantages and disadvantages of laying diagonally
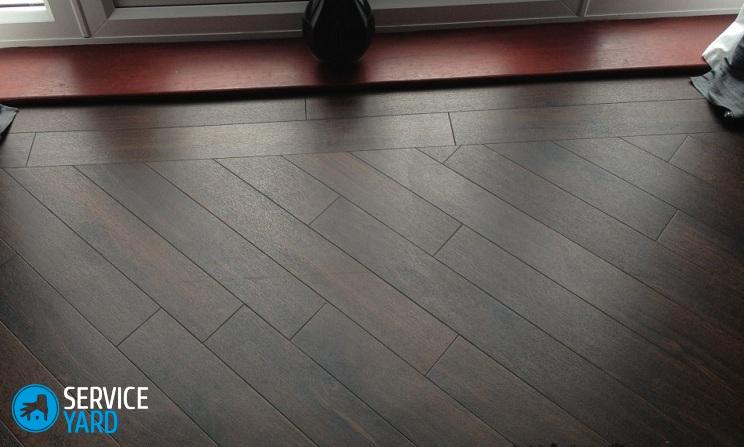
Laminated boards are a worthy material not only because of the interesting and varied choice of color and texture, which imitates a wooden surface, but also due to the fact that they give special coziness and comfort to the interior of the room.
Important! When installing the laminate, you can visually enlarge the room. It can be stacked both across and in a straight room, which makes it possible to visually adjust the volume of the room.
Benefits:
- Laying laminated boards diagonally creates an interesting, stylish room design.
- This method expands the visual space.
- In rooms where the window is non-standard located, in order to maintain the principle of parallelism with a ray of light, diagonal laying will cope with this task.
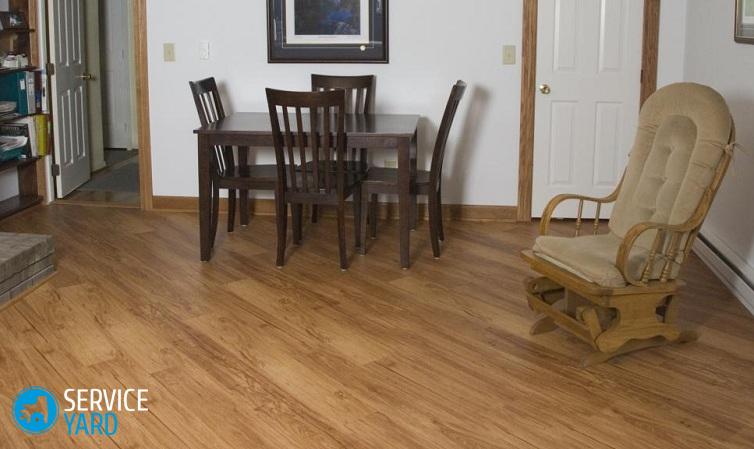
- This method looks best in rooms that are not loaded with furniture and accessories.
- The panels located at an angle to the walls of the room will hide geometric irregularities.
disadvantages
The disadvantage is the higher consumption of the laminate, so buy it with a margin of 10%. Some advise buying even 15-20% more. Professionals say that 5% will be enough. If the laminate is laid diagonally with your own hands for the first time, be safe and take material with a large margin.
to contents ↑Important! Buy the right amount at once, because there is no guarantee that models from another batch will not differ in color.
Surface preparation
To lay the laminate diagonally successfully, you need to perform a number of preparatory work:
- Installation can be done either on a concrete screed, having completed the necessary waterproofing and laying of a special substrate, or on an old coating - a wooden floor, linoleum, etc. The main requirement is a perfectly flat surface and stability at any point.
- Linoleum should not have bubbles, through scuffs, delaminations and signs of destruction of the concrete base under it.
- If you decide to lay the laminate on a concrete screed, you need to primer the surface with a deep penetrating waterproofing compound. Next, you need to lay a plastic film.
Important! All work is carried out after complete solidification of the concrete screed.
- A backing is laid under the laminate - natural cork or polyurethane foam, and fastened together with adhesive tape.
- If possible, it is better to cover the room with OSB tiles - they will not only create a flat surface, but also an additional thermo - and soundproofing effect.
Preparation of materials and tools
To adapt the panels to the temperature and humidity of the room after purchase, bring it into the room where the installation will be carried out, leave it for 2-3 days. Draw for yourself a plan for the upcoming work to avoid mistakes when cutting material.
During installation, you will need the following tools:
- Roulette.
- Hammer.
- Jigsaw.
- Ruler and pencil.
- Spacer wedges.
- Bar.
- The square.
- Curved mount.
Diagonal Laying Laminate
Laying the laminate diagonally is possible in two ways: the first - from one of the far corners of the room, and the second - from the center and alternately in one and the other direction.
From the corner
Such features such technology will have:
- When mounting from an angle, work begins with one panel, which is cut from two sides to the desired angle.
- A 45 degree angle is best used - the panels will be more versatile and there will be less waste.
Important! Angles from 30 to 40 degrees are also allowed. If you make the angle less than 30, your coating will look ugly.
- The first trim will set the direction for subsequent panels.
- Leave a gap of about 10 mm from the wall to compensate for the thermal expansion of the laminate.
Important! If there is a heating pipe near the corner to simplify the work, start laying from it - to do this, cut a hole at the junction of the two panels.
- From the first panel, move to the center of the room. A corner that has remained unclosed can be laid later, using scraps from the material that will appear during the work. Each next row will increase in length.
Important! Do not forget to shift the transverse seams half the length of the panel, and the strength will be higher and more beautiful.
Installation Recommendations:
- Put the row in its place, but do not tighten the previous one in the castle.
- After - take measurements at two points on both sides of the end of the last panel to the wall.
- Subtract 10 mm from the obtained value and transfer it to a new panel, which you will saw using a pencil.
- Saw the panel along the intended line using a jigsaw or hacksaw.
- In the same way, measurements are made and cutting on the other side of the row. The angle that remains after trimming should fit on the other side of the row, provided that the walls are parallel. In this way you will not have an overspending of material.
Important! Before cutting, to avoid an incorrectly cut corner, carefully look at where the spike is located, where the lock groove of the laminated board.
- When all the parts are ready for the full row, remove it from the locks, fully assemble at the ends, then enter the locks of the previous row completely.
Important! When the row becomes very long, ask someone for help, since it is difficult to independently carry out this procedure.
- Insert the spacer wedges from the wall, after mounting the solid strip.
In the same way, laying is done throughout the room. An exception may be internal angles. If any, it is necessary to make measurements at three points - at the point of intersection of the wall and along the edges of the board.
From the center
Laying the laminate diagonally from the center of the room begins with the installation of a long row, it will set the direction to everyone else. Its installation is carried out as described above. Then laying the laminate first goes to one corner, and then to the other.
Important! This method is suitable for rooms where there are columns, large ledges or the coating passes inextricably from one room to another.
In this situation, it is advisable to mount the first row tangentially to the outer corner. If this is not possible, it is necessary to measure at least three points.
When installing the adhesive laminate, it is necessary that the adhesive seizes within 3-4 hours after laying the first three rows.
When laying laminated boards with the “Click” lock system, it may not be possible to use the circuit from the center, because the system of such locks requires snapping at a certain angle of the comb part into the groove, followed by snapping.Installation is only in one direction.
Important! Keep this in mind when planning your work.
After laying the entire laminate, remove the spacer wedges and screw them to the baseboard wall.
to contents ↑Stock footage
Laying the laminate diagonally with your own hands does not endure haste. Take all measurements very carefully, accurately, carefully. As a result, you will get an original and beautiful floor that will visually increase the space and fit into any interior. To minimize waste, use the remaining trim to the maximum.
- How to choose a vacuum cleaner taking into account the characteristics of the house and coatings?
- What to look for when choosing a water delivery
- How to quickly create comfort at home - tips for housewives
- How to choose the perfect TV - useful tips
- What to look for when choosing blinds
- What should be running shoes?
- What useful things can you buy in a hardware store
- Iphone 11 pro max review
- Than iPhone is better than Android smartphones
Report typo
Text to be sent to our editors: