DIY Radius Sliding Wardrobe
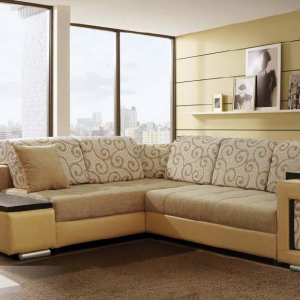
Today, demand for wardrobes, especially rounded ones, is growing more and more. This is due not only to their attractive appearance, but also to the structural characteristics, since such furniture is quite spacious and is able to transform the interior beyond recognition. Unfortunately, these designs are very expensive and not everyone can afford. Therefore, despite all the complexity, we suggest you make a radius wardrobe with your own hands. In this article, our experts will tell you in detail how to make and assemble such a design yourself, as well as reveal all the nuances and subtleties of this process.
to contents ↑Features of Radius Sliding Wardrobes
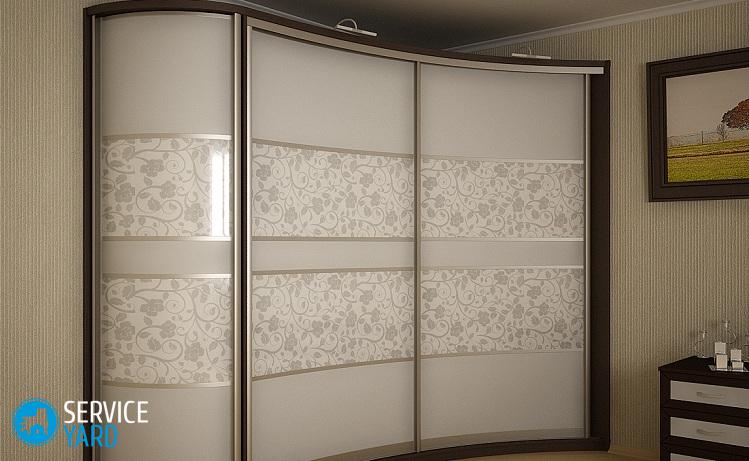
The main feature of such structures is a rather unusual form, which allows them to be placed in almost every room. This type of furniture will be most relevant in small rooms, because, despite their spaciousness, radius sliding wardrobes take up very little space.
Important! The side wall of a standard direct sliding wardrobe is at least 60 centimeters wide. Radius structures may not have side walls at all.
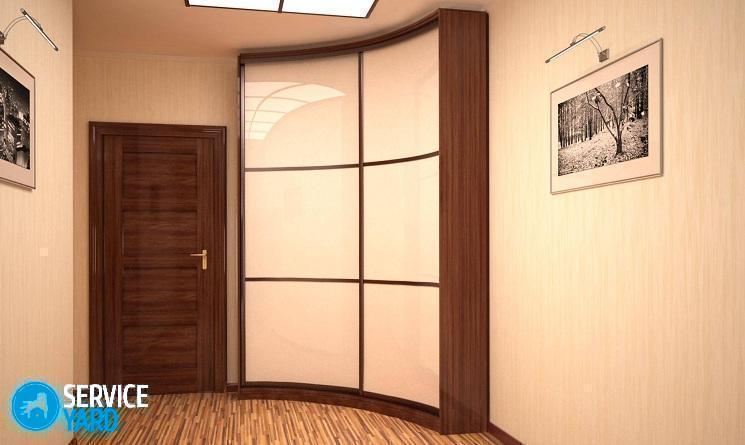
Such products can be made of absolutely any shape, and thanks to a special sliding mechanism, the cabinet can easily be hidden in a niche reserved for it.
In addition, the installation of a radius wardrobe has a number of advantages:
- Visual increase in space due to the presence of mirrors or mirror inserts on the doors;
- Gives the interior a more modern and original appearance;
- A wide range of diverse models and design solutions in the design;
- The ability to use the walls of the room as the walls of the product itself.
The main types of radius wardrobes
Before you make a radius wardrobe, it is very important to determine the type of structure. In the modern market today, there are only two types of such products:
- Case. This is an independent piece of furniture that contains absolutely all the details that a full-fledged cabinet should have. Such products are mobile, respectively - they can be moved in case of repair or relocation.
Important! The only drawback of this type of furniture is its overall size.
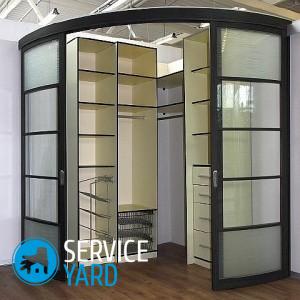
- Embedded. Such designs are not equipped with side walls, ceiling and floor. Their main advantage is that the shape and parameters of the finished product are developed exclusively for the place in which this design will be placed. Unfortunately, the built-in radial sliding wardrobes are not transportable.
Necessary fittings and accessories
The main feature of all sliding wardrobes is their sliding system, which is made of steel or aluminum profile.
Important! Experts recommend using an aluminum profile for radius structures, as it is better in quality than steel.
As for the thickness of the profile, it should be no more than 1.2 millimeters.
Important! If the thickness of the profile is less than the above parameter, in this case there is a risk of anodizing the coating or loss of the sheet facade of the material.
Also, you should always remember that after installation the glass will be in constant voltage, respectively - the profile must be selected quite strong so that it can withstand such a load.
Important! Today you can find a ready-made bent profile with a width of up to 2500 millimeters and a radius in the range from 300 to 5000 millimeters.
In addition, before making a bent door for the cabinet, it is very important to choose a sliding system. In radius designs, they can be of two types:
- Suspension mechanisms. In this case, the door is suspended on rollers that are installed in the upper guide, respectively - only the lower part of the sash is fixed.
Important! Suspension structures are considered unreliable and of poor quality, since the main load falls solely on the cabinet itself.
- Mechanisms with a sliding system located below. In this case, the door is fixed on the upper guide, and the rollers for sliding are installed at the bottom. This design is more reliable and significantly increases the operating life of the cabinet.
Due to its original and highly non-standard form, we will pay more attention to the door of the radius wardrobe, which consists of several elements at once:
- Lateral vertical profiles that act as handles. They can be symmetric and asymmetric. The first - look the same on both sides, and the second - divide the sash on the outer and outer sides.
- Asymmetric upper rollers. With their help, the door is held in the opening.
- Upper frame. It is necessary for fixing the rollers and installing the door in the upper opening.
- The lower frame is the mounting location of the wheels. In addition, it provides smooth sliding of the door along the guide.
- Filling. It can be completely different, depending on your taste preferences. Most often, glass, wood, mirrors are used for these purposes.
- Sealant. It protects the structure from dust, and also softens the impact of the door during its closure.
- Door stub. It is designed to fix and secure the side profiles.
- Adjustment and assembly screws adjust and improve the quality of the slide.
- The stopper or positioner makes it possible to fix the door in a certain position convenient for you.
How to make a radius wardrobe with your own hands?
The manufacturing process of the radial wardrobe is divided into two main stages:
- Designing the future design.
- Assembly of the product itself.
Next, we will tell you in more detail about each of these stages.
Designing a Radius Sliding Wardrobe
To begin with, it is very important to determine the size of the future product. In this you will be an excellent assistant online designer.
Important! The online designer is a special software that sets the necessary parameters for the future design. After that, based on these data, the future appearance of the wardrobe, the number of doors and the content is selected. Thanks to this designer, you can visually see the future product.
In order for the finished result to exceed all your expectations, we offer you some tips that will greatly simplify the entire design process:
- First of all, it is necessary to determine the location of the finished product, as well as its functional purpose.
- At least 2 sections should be reserved for storing clothes. This way you can separate things by season.
- The depth of the cabinet should be at least 60 centimeters. This is the best option that will allow you to easily place the shelves.
- If you plan to carry out additional illumination in the cabinet, the top cover must be pushed forward by 12-17 centimeters.
- The width of the inner shelves should be no more than 65 centimeters, otherwise - under the weight they simply bend.
- The width of the wings should be at least 50 centimeters, as there is a risk of them falling out of the rails.
In order to make a quality construction, it is also very important to know and consider the following factors when designing:
- The number of doors should always be equal to the number of compartments.
- Chipboard thickness directly affects the appearance and strength of the finished product.
- All doors should have the same thickness.
- You can’t have retractable baskets for storing things in front of doors, otherwise - there may be problems with opening them.
In addition, before assembly, it is very important to prepare in advance the tools and materials that you will need during work. You will need:
- Drawings of the product itself;
- Drill;
- Pencil;
- Screwdriver;
- Square;
- Trim panels: top, side and bottom;
- Furniture panel about 18 millimeters thick;
- Doors
- Necessary fittings and accessories;
- Drawers and guides.
The process of manufacturing and assembling a radius wardrobe
In order to make a radiused cabinet with your own hands, it is very important to adhere to this progress:
- Using the level, make notes on the wall with a pencil in those places where the vertical posts will be installed.
- On the ceiling, mark the future layout of the profiles.
- Note the height of the shelves.
- Drill holes.
- Use a hammer to hammer the dowels into the holes already prepared.
- Install the mezzanine shelf according to the previously made markings.
- Install the side profile.
- Assemble the filling of the entire structure, including drawers and shelves. This should be done according to the markup.
- Mount the bezels. Use a screwdriver to fix them to the side wall, ceiling and floor.
- On the previously installed bezels, secure the upper and lower profiles.
- Install the cabinet doors. To do this, attach vertical profiles on the sides and install the door seal.
- Lock the lower and upper door frames.
- Check the correctness and ease of sliding of the installed door.
to contents ↑Important! Pay attention to the fact that radial roller systems attached to the ceiling should not be installed on a surface made of drywall and similar materials. This is due to the fact that the average load on the ceiling will be about 30 kilograms, and during the opening and closing of doors, they will still create additional vibrations. Accordingly, the ceiling made of drywall simply can not withstand such a load.
Stock footage
The manufacture and assembly of a radius sliding wardrobe will not be difficult for you if you have selected high-quality materials and made the correct calculations. Also do not forget to put into practice the above tips and recommendations of our experts. Thanks to them, you will not only significantly save time on the manufacture of this design, but also in the end you will get a quality product that will delight you and your loved ones.