DIY bowstring for stairs
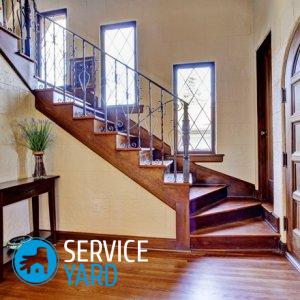
If you are faced with choosing a design option for a staircase to install it in your private house, then pay attention to the models on the bowstring. This is the classic way to execute them. Such a staircase can be made without risers in order to facilitate the design and reduce the cost of buying supplies. What steps are - everyone knows, but here’s how a bowstring is made for their fastening - this is already a more complicated issue. In this article we will tell you how to make a bowstring for a staircase with your own hands.
to contents ↑What is a bowstring?
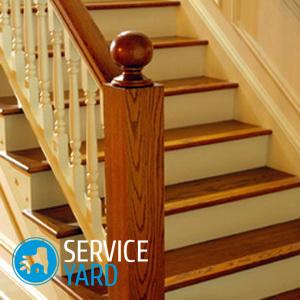
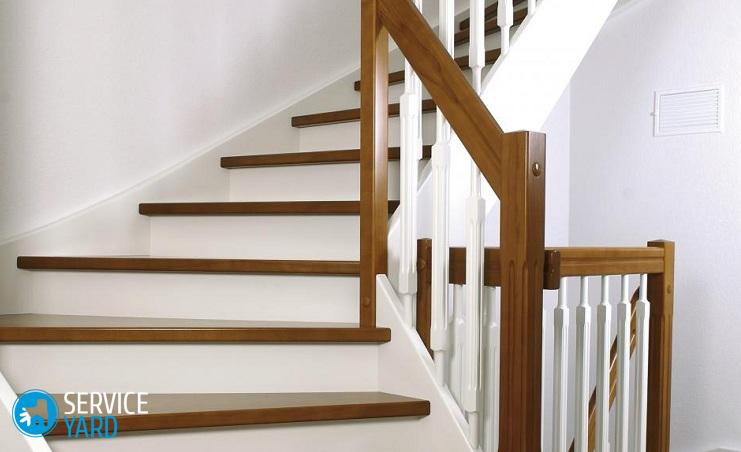
Bowstring - supporting support beams, which are located on the sides, have grooves cut from the inside. It is these grooves that are used to set the steps. As a rule, there are two such beams in the design. But in those cases when the staircase adjoins the wall on one side, then only one bowstring on the opposite side is required. And from the side of the wall it is fastened with bolts.
to contents ↑Important! Distinguish at the moment, such stairs are open and with risers. It is worth noting that their absence greatly facilitates the design, makes it less costly in financial terms, but only in terms of reliability, it is not particularly pleasing.
What material to make a bowstring?
Making a bowstring for a staircase with your own hands begins with the choice of building material, more often metal or wood is preferred.
Important! The best option can safely be called wood. Designs from it look beautiful, in addition, there is no need to use welding, which often spoils the appearance of rough seams.
Pay attention to such tree species when choosing the right material:
- Conifers. A huge drawback of pine, spruce, cedar, fir is the allocation of resin, which will certainly affect how the paint goes. However, such breeds just look great in natural color. They have excellent technical characteristics.
- Deciduous. Most often, this type of wood is preferred, due to the fact that it is simple in terms of staining and processing. These include cherry, oak, beech, maple.
to contents ↑Important! In order to select lumber for the manufacture of such a device, it is necessary to carefully calculate its dimensions so that as a result the beam comes out whole, there is no need to do splicing. Its parameters should correspond to design recommendations as much as possible.
How to independently calculate a bowstring?
Before you make a bowstring for the stairs, make its calculation according to the formula, which will depend on the length of the step. There are certain rules that must be followed in the calculation process:
- The human step has a length of 63 cm. Therefore, the optimal ratio in this case for calculation in the formula would be: the step depth plus two step heights, as a result we get 66 cm.
- A comfortable angle of inclination of the stairs can be called 30-40 degrees.
- The optimal size for the step depth is 28-30 cm. If your bowstring cannot provide the desired depth, then it is better to make the step wider, thus compensating for the drawback.
- The ideal height of the step is 15-20 cm.
If we talk about the dimensions of the bowstring, then they directly depend on the length of the future flight of stairs. In addition, there are standard parameters:
- The support beam, having a width of 90 cm, should have a thickness of at least 4 cm. A suitable level for cutting grooves is 2-3 cm.
Important! The width of the grooves and the distance between them define the span characteristics, i.e. the height and width of the steps. In addition, these figures affect the angle of the staircase.
- The minimum beam width is 27.5 cm. This value is due to the need to leave free space above and below the steps, and it should be at least 5 cm wide.
Important! In the process of marking, it must be borne in mind that the number of steps in fact will be less than the calculated number. The fact is that the very last step is the beginning of the second floor. For marking, you can use a corner or a ruler.
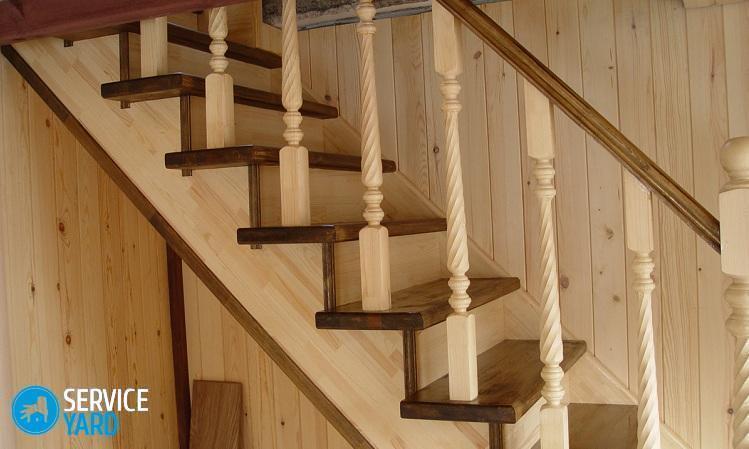
Regarding the bowstring, steps can be placed in the following ways:
- The lack of a reference line. In this case, the grooves are made open.
- With a reference line. This is intended to be a closed box.
- The presence of a reference line without inserts. In this situation, a support mount, corners, lining is used.
to contents ↑Important! The reference line is a feature that is applied along the entire length of the edge of the support beam. It is located at a certain level, at least 5 cm from the edge. After preparing all the details of the stairs, you can treat them with an antiseptic, then impregnate with a primer.
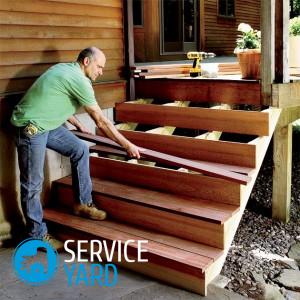
DIY string making
The first step is to calculate, then prepare all the required material. Then markup is carried out. Only after carrying out all these procedures can you start manufacturing.
Work is carried out using the following tools:
- Building level.
- Line.
- Electric jigsaw.
- Manual milling machine.
- Rubber-tipped hammer.
- Drills.
Create a bowstring using this diagram:
- Use the drawing of the elements of the stairs, the bowstring should maximally correspond to all previously obtained parameters. Mark with a manual milling machine. Cut out the grooves to prepare it for installation.
- Install the structure. The bowstring should adjoin both surfaces, that is, the ceiling and the staircase of the first floor or half of the second floor.
- To cut the grooves, you need to prepare a stencil. Nail a few bars parallel to the edge of the bowstring. Keep the distance between them corresponding to its width. Position the stencil to create a reference line. Put the stencil on the template directly under the router, align the support lines, draw lines that would correspond to the sides of the tread.
- Cut holes with a drill or a jigsaw. They should be a little more than intended. Lay the bowstrings on the goats, mark with a stencil. Saw a hole with a diameter of 15-20 mm with a milling cutter. Walk in the corners with a chisel.
- Gather a march laid on its side so that the bowstring is located below. Draw a line from the inside of the upper step and riser.
- Draw a line that will connect the trailing edge of the frieze tread directly to the level of the plinth. More often it has a length of 7.5 cm.
- Remove the upper riser, saw off the workpiece along the guides.
- Saw the bottom of the beam parallel to the floor line.
- Make a notch before installing it on the upper support post. We will use it to mount the rack on the topmost floor.
- Install the bowstring of the ladder with the help of the tongues to both support posts in the specially prepared grooves.
- To increase the reliability of fastenings, fasten the march directly to the beams. This can be done easily through the support posts using screws. It is attached to the wall directly through the bowstring.
Stock footage
As it turned out, there is nothing complicated in this work, of course, if you carefully calculate, think through, buy, take into account all the most important points. Support racks can be installed in pre-made holes in the floor screed or with steel anchors.