DIY press bench
In order to constantly maintain your body in excellent shape, you will need moderate physical activity, good nutrition and the rest necessary for recovery. The main indicator of a developed sports body is strong muscles on the abdomen, for which special simulators are needed. The most famous of them is the so-called press bench, which helps to pump up not only the stomach, but also some of the back muscles. You can buy it without any problems in any store selling sports equipment and equipment. However, this mainly concerns residents of large and medium-sized cities, for all the others there remains only such an option as a do-it-yourself press bench. Its production will not take much time and will cost quite inexpensively, but at the exit you will get a full-fledged sports equipment made by yourself.
to contents ↑Types of simulators for the press
You can pump up a beautiful press in the form of cubes on your stomach in any gym or at home using various combination exercises and special simulators. Very often they carry with them many auxiliary functions, but their main purpose is still the abdominal press.
The main types of simulators are:
- Hyperextension sports equipment is one of the most popular types for pumping the muscles of the abdomen, back and buttocks. They are very convenient and can change their settings for each individual person, which reduces the possibility of injury to the very minimum.
- Ab couch press simulators are a sports equipment that has an unusual shape of a small chair, completely covered with balls. The well-thought-out design of this simulator has a beneficial effect on most of the muscles of a person, especially on the area of his press. In addition, it includes special inserts consisting of rollers, which during classes additionally do back massage.
Important! The simulator has three adjustable levels for different loads, allowing you to make a smooth transition from simple exercises to more difficult.
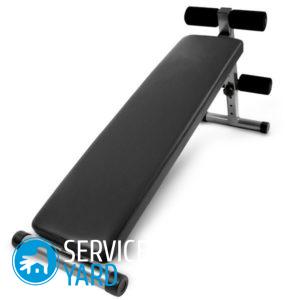
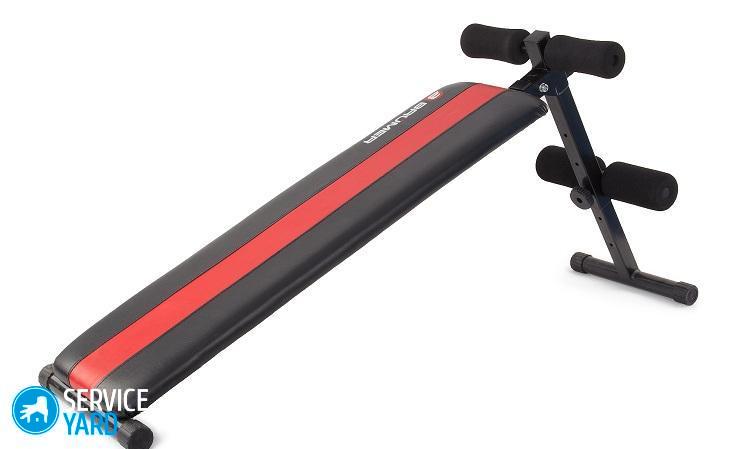
- Simulators for the press in the form of a bench are the most famous since ancient times. This is a fairly simple design, which takes up very little space, so it is very popular for homework. Using this simulator, you can achieve exactly the same outstanding results as when using its most modern and expensive counterparts.
Benefits of Using a Press Bench
To achieve a real result, it is not necessary to go to the gym. Recently, many of those who constantly monitor their abs prefer home workouts, as they have a number of various advantages:
- huge time savings - there is no need to make daily trips to the gym and back;
- hygiene - only you do it on your press bench;
- financial savings - you do not pay for a subscription and this money remains in your pocket;
- you can swing as much as you want;
- during training, you can turn on exactly the kind of music you want and set the volume that suits you;
- you train only when you want it, without looking at your subscription;
- there is no need for a sports dress code, you can do whatever you want on your simulator;
- nobody will distract you;
- only you yourself determine the duration of the training and the level of stress on your abs.
Obtaining these advantages is not so difficult, but for this you will need your own simulator and, if for some reason you can’t get it in the store, then you just have to make a press bench with your own hands.
to contents ↑Do-it-yourself press bench
There are several different options for self-made press benches. One of them is given below.
Important! This design is designed for any person whose mass is not more than 100 kg, and is assembled from several pipes of standard size and some other ordinary material.
Tools and materials
So, for our Roman bench are necessary:
- drill with drills of different diameters;
- half a square meter of dense foam;
- steel pipes of medium diameter (about 4 meters);
- several metal strips;
- 14 nuts with bolts;
- a piece of board or fiberboard with a size of 1000 × 400 cm;
- welding machine;
- hacksaw for metal or grinder.
Device
The whole structure of the metal frame is quite simple:
- Its front part is made with a height of 500 to 800 mm, depending on the growth of the future athlete.
Important! To obtain a better bench stability coefficient, it is necessary to slightly tilt the front pillar slightly outward.
- The full length of the bar, which is used to support the legs, is also made for a specific person, but at the same time it can still be adjusted to work with someone else. The supporting legs of the Roman bench can be set along its length in the range from 350 to 950 mm.
- To achieve the normal stability of the entire simulator, on the edges of its legs dress pads on the bicycle steering wheel, consisting of rubber.
Important! The design features of this simulator allow you to adjust the required height for the legs of each user, which is a very convenient moment.
- The entire assembly is made using a separate retainer for the bicycle saddle tube.
- The stand, which is located in the very center of the bench, is reinforced at the top with an additional metal strip for greater reliability.
- The frame is mounted using electric welding. Well, if you know how to work with her, but if not, then it doesn’t matter, you will still have enough time to practice.
- Such an important part of the simulator as its board is made of three different parts and is fixed to the base of the frame with the help of individual bolts. The heads of these bolts are recessed into the material, and they themselves are passed through the holes of all pipes, the holes of the board and fixed at the ends of special fastening plates.
- The rollers serving as a leg support are made of foam rubber, fixed with electrical tape and covered with fabric covers.
Swedish bench press bench
In the event that you already have a Swedish wall, it will become even easier to make a simulator for the press. It will be possible to limit only to materials made of wood. The basis of the entire structure will be a board, which with the help of special fasteners can cling to the bars of the Swedish wall. For its greater stability, from the bottom you can attach a small segment of a round beam, of such a length that its ends extend on each side of 10-15 centimeters.
to contents ↑Important! As you can see, in this case, even a separate frame is not required, since your Swedish wall takes on its function. In addition, it is desirable to thoroughly clean the entire finished structure with sandpaper and cover it with any varnish to give the simulator a more beautiful appearance.
Improved press bench
The main difference between such a simulator is the presence of a convenient function that allows you to adjust the slope of the board. The design is also equipped with convenient foot clamps that fix the legs in one position and prevent them from moving in time with the exercise. Before you begin to think about how to make a bench for the press in its improved version, it is recommended to prepare a drawing and carry out all the necessary calculations.
Materials
To work, you need material such as:
- square steel pipes;
- a thick wooden board one meter long;
- a small amount of foam for boards and clamps;
- leatherette for the board;
- black paint.

Operating procedure
First, it will be necessary to build a frame. It is made of square pipes as follows:
- A pipe with a length of 110 cm is taken and laid on the floor, then half-meter lengths of the same pipe are welded across its edges across its edges.
- A stand is fixed at one end to a height of 26 cm, holes for bolts are drilled.
- Now it’s up to the part made of a pipe of a smaller diameter in the form of the letter T. A smaller diameter is necessary so that this part can go into the main rack a little with grinding. Here, you will also need to make holes, so that they completely coincide with the holes on the rack itself. This is necessary to adjust the parts for the legs.
- Now it is measured exactly half a meter from the edge of the foot element and mount another rack to a height of 30 cm.
- Further from this position 33 cm are postponed, and we will put the next rack to a height of 35 cm.
- Then, holes are made in that rack, which is fixed at a height of 30 centimeters, alternating every five centimeters.
- The following are cut out the parts on the upper edge of the 35 cm rack, resulting in plates on its sides that are also drilled under a large bolt.
- Now the design of the upper part is made out. First, two corners are cut to an agreed length and welded together, and then a finished pipe with holes is already cooked to them.
- New holes are drilled in the walls of the finished structure and the main board is fixed through them.
- A 40 cm long pipe is placed across the legs, after which the finished upper frame freely sits on the uprights.
- Now it remains to tighten the head part with a bolt, and set the adjustable base to the required angle and also fix it.
- At the final stage of the work, the board and parts for the legs are upholstered in leather and foam, after which all the metal parts are painted and the press bench is completely ready with your own hands.
Wooden Roman Press Bench
Almost anyone, even just a beginner, can make a Roman bench out of wood. Therefore, a Roman bench with your own hands will require very little effort. It will require boards, bars and, if there are no boards at hand, then a sheet of ordinary plywood.
This simulator is performed using the following technology:
- You will need a separate and suitable bench, which can be made from one wide board with a thickness of 3 to 5 cm, or, if not, from a piece of plywood of similar sizes.
- A pair of vertical posts is also necessary, in which the cross section is about 50x50 mm and their height is 1 meter. From the edges of each rack, approximately 5 cm, it is necessary to make a hole with a diameter of about 3 cm, into which then the edges of the crossbar for the legs will be inserted.
- Crossbar for legs. In order to make it, it will be necessary to take a round beam with a length of one meter and a diameter of about 3 cm. The edges of the crossbar must be placed in the holes that have already been prepared before in vertical racks.
- It will take the so-called supporting beam one meter long and with a section of 50x50. She will connect the two racks. It is mounted in the middle area. In addition, this crossbar will become a good and reliable support for the back.
- Support needed for the seat.With its help, the back will be fixed on the crossbar, which is located between the uprights. It is made of a bar or board with a thickness of 3 cm. The length of the support should be slightly shorter than the seat or exactly the same.
- The so-called stiffeners. The seat will be reliable if stiffening ribs are used to reinforce it. They can be mounted perpendicular to the bottom of the seat. Their number can be absolutely arbitrary, they are made exactly from the same material as the seat. Only a rib of thickened material is attached to the back below, since its main function will be a floor stand. To reduce the level of wear on the underside, it is better to put a small plate of metal.
- Elements for fasteners. When assembling this design, ordinary screws or self-tapping screws are used.
to contents ↑Important! The main disadvantages of this simulator are its bulkiness (not so easy to install at home) and not very beautiful appearance. And the advantage is durability, reliability and low manufacturing cost. The place for this simulator can be the yard of the house or the technical floor above the apartment.
Stock footage
If you started training your abs at home, then remember that from constantly performed exercises you will not always be able to get the desired effect. Although at the very first stage your press bench is quite suitable, however, further simulators will be required in the future. For example, those that will ensure the rapid achievement of the desired result. These simulators have additional advantages and allow you to diversify the load while increasing it. In addition, it is possible to work with dentate and oblique muscles of the abdomen, and not just with its upper section.